Showing posts with label eclips. Show all posts

Tuesday, November 2, 2010

Holiday Luminaria


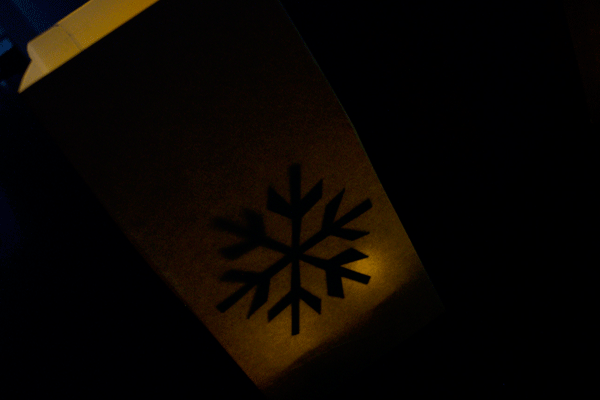
Today I Created | A set of Holiday Luminarias

These were inspired by the Halloween Luminaria on Tim Holtz's Blog. I wanted to try a different twist on the idea.

I started by making my own bags. I used light-weight, 12"x12" papers that were a solid tan color similar to a real paper bag. I die cut them using the Sizzix Bag, Tall die. The nice part about cutting bags with this die is that they are smaller than lunch bags so the battery-operated tea lights fit nicely.

Before assembling the bags I glued die cuts of two styles of reindeer and a snowflake cut from black paper. The snowflake and one reindeer were cut from the eclips Christmas & Traditions Alphabet cartridge. I was able to cut them small enough to fit within the smaller bag. The other reindeer is from the Reindeer Flight die by Tim Holtz.

I assembled the bags and placed the flameless tea lights inside. One tea light per bag worked well but you can use more if you want it brighter. Below is a photo of how the same bags appear in regular light.

Tuesday, September 14, 2010

Distressed Snowman Tag

Today I Created | A wax-resist snowman tag.

The idea for this project came from the lessons I learned while creating yesterday's Halloween tag.

I started with a pale blue tag cut from the eclips Christmas cartridge. I used the Tim Holtz Snow Flurries Texture Fades to create the snowflake pattern. I rubbed the raised surfaces with wax. Then I sprayed a light coating of Sea Glass Glimmer Mist and wiped off any excess. This created the overall snowflake pattern. I let this dry thoroughly so that the paper was stiff.

Next, I ran it through the Snowman Texture Fades to emboss the snowman on top of the snowflake pattern. The cool part of this technique is that the flat part of the Snowman Texture Fade flattened the background snowflakes so only the snowman is a raised pattern.

Finally I used Denim Distress Inks to highlight the edges of the Snowman.

Monday, September 13, 2010

Halloween Tag

Today I Created | A Halloween tag using a wax-resist technique.

I had an off-white tag with a Sizzix Texture Fade Cracked pattern embossed on it. I began to wonder what would happen if I rubbed the raised parts with wax and then sprayed Glimmer Mist on top.

Luckily I had a block of wax left over from my old candle-making days so I rubbed and sprayed and was quite happy with the results.

I added a pumpkin die cut sticker from Cosmo Cricket and used some buttons for eyes. The words and crow are cut from the eclips Halloween cartridge. And the tag is cut from the eclips Christmas cartridge.

This gave me an idea to experiment further with this technique.

Monday, August 16, 2010

Tree Banner

Today I created | A Banner made from upside-down, die cut trees.

I cut these Christmas tree shapes using the eclips but noticed that they had such a nice form when seen upside down. I immediately thought of pennant banners. The only thing I had to revise was to trim down the star at the top of the tree.

You can see the Christmas tree shape if you view the banner upside down.

Saturday, August 14, 2010

Christmas Tag

Today I created | A Christmas tag

I'm really beginning to enjoy making tags. I think of them as little bits of art.

This reindeer Christmas tag was first inked with red and black along the edges. Then I embossed it and applied green paint with a brayer.

Previously I had embossed the tag and then added the inked edges but I experimented with adding the ink before embossing. This technique allowed the "valleys" between the raised parts to show more color from the ink.

The reindeer and tag were cut using the eclips. The embossed texture is from a Tim Holtz Texture Fade.

Thursday, August 12, 2010

Celebrate Spring

Today I created | A tag to celebrate Spring.

I know that it is the middle of Summer but with colors like bright green and lavender it just feels like Spring.

I played with Glimmer Mists and first sprayed light green and lavender on a blank tag. I then, carefully attached a "mask" cut from an eclips diecut and sprayed a darker green to create the leaves.

The flower was created by spraying Glimmer Mist on two blank Prima flowers. I stamped on the larger flower for additional interest. I then stacked them and added the button.

This tag gave me a great excuse to use colors and embellishments that I don't normally use in my scrapbooking projects.

Wednesday, August 11, 2010

Fast Flowers


Today I created | A mass of diecut paper flowers.

It is my co-worker's birthday next week. I wanted to create something to decorate her desk. She likes the color combination of teal and orange.

I cut a bunch of flowers in different shapes and sizes using the eclips and then stacked them in three layers. Since these didn't need to be archival, I stapled the layers together.

Tuesday, August 10, 2010

Halloween Tag


Today I created | An embossed Halloween tag.

I'm not a big "tag maker". I've never made a tag before.

This tag was cut using the eclips shape cutter. I embossed the spider web using one of the new Tim Holtz Texture Fades. Next I inked and painted and added Perfect Pearls and inked some more until it looked pretty distressed. I stamped the words "Happy Halloween" on adhesive-backed, cotton tape from cutetape.com. The hole reinforcer is also from cutetape.com.

The key might be a real skeleton key that I had in my stash. I curled some wire and used it to attach the key. I tied it off with some green velvet ribbon.

Lots of work for one tag. But since the purpose of this Blog is to stretch my creative wings and try new things then this all made sense. Tags are perfect little "canvases" for art to be created and then given away.
Related Posts Plugin for WordPress, Blogger...