Showing posts with label cards. Show all posts

Monday, December 19, 2011

Christmas Pocket Card

I finally completed my annual Christmas card for Dear Handyman's sister in England. Yes, I know it is terribly late. Inspiration doesn't always obey the calendar.

Every year I like to send Brenda a mini-scrapbook Christmas card. She doesn't often get photographs of her family here so I like to send a card that is filled with photos. I'm not going to show the photo tags but you can imagine all of these pockets having photos and stories. I created this using the Sizzix Pocket Page & Tag die that I designed.

This is the front page. I used the Basic Grey Curio line of papers. I wanted a two-sided paper that was in a non-traditional red and green color palette. On this cover I used vintage lace that I tea-dyed, a vintage Bingo number and vintage holly leaves. The Christmas quote was from an old Christmas card that I scanned. I stamped the words "Merry Christmas" on a die cut Tattered Banner.

I kept this next page very simple. I first glued a piece of vintage 8mm film around the page. Next I scanned and printed an old Christmas sticker of Santa Claus that I thrifted here. I trimmed it and glued it inside a bottlecap. I then filled it with a layer of Glossy Accents to add shine. Here is a detailed image below. You can download the Santa image at the end of this post.

This is the other side of the page above. You can see the film strip here as well. I sewed some vintage buttons to a ticket.

This next page was to announce the engagement of her nephew. I used some small white silk flowers and tied them to the word key. I glued on a clear heart button on top {hard to see} and then glued everything to the ticket.

On the tag below, I used a vintage earring as the embellishment. I cut the back off of a piece of costume jewelry and glued it to the tag. Because the tag was decorated, I kept the pocket page very simple.

The last page has a rubber stamp of Santa because I love this Retro Santa stamp by Tim Holtz.

I know this won't get to England before Christmas but it is the thought that counts and there is a lot of warm thoughts in this card.

Here is the vintage Santa sticker that I used inside the bottlecap. Feel free to download this as long as it is for non-commercial use. Merry Christmas!

This is linked to:

Wednesday, April 27, 2011

Mother's Day Coupon Book

Mother's Day is fast approaching so I wanted to make something to celebrate all of the mothers out there.

I used to make coupon books for my mother when I was little. Inside were handwritten chores that I promised to do when asked. So to continue this tradition, I created a Mother's Day coupon book.

I used the Sizzix, Bigz Pro Die, Pocket Page and Tag that I designed. It will be available in craft stores in May. This is exactly the type of project I had in mind when I created this die.

I also used the Flowers, 3-D die to embellish the cover. All of the papers are from Cosmo Cricket.

Here are the inside pages with their removable coupon tags.

Here are a few design tips:
I used four sheets of double-sided cardstock. I also cut additional tags out of solid-color cardstock. Once everything was folded I began embellishing the pages.

I die cut the 3-D flowers and then lightly inked the edges. After they were glued to the page, I added small pearl buttons in the center. 

I used double-sided foam adhesive to slightly raise the bee off of the page. This added a little dimension without adding too much bulk.

 I first stitched the lace onto the page and then glued the rick-rack on top of the stitching.

 Nothing is complete without vintage buttons. The card that reads "Bon Appétit" had a straight edge along the top which didn't match with the scallop edge of the pocket so I added the buttons to hide the edge.

I had cut the blue zigzag edge off of the tag on the cover that reads "For You". I used the leftover zigzag pieces to soften the edges of this red bowl tag. The brad was meant to read "WOW" but everyone knows that MOM is WOW upside down.

 I added a few bits of bling to the center of these flowers.

I left the last page very simple. I envision this as the page where you could add a personal note to thank Mom for everything she does. This could also be the page where the gift certificate to the spa could be included... (hint hint, in case my son reads this).

I was featured on:


This is linked to:
504 MainA Little Knick Knack, All Things Fee, All Thingz RelatedBetween Naps on the PorchBeyond the Picket Fence, Blue Cricket Design, Cherished TreasuresCommon Ground, Craft Envy, Creative Every Day, FaveCrafts,  Finding Fabulous, Homemaker on a Dime,  I {heart} NaptimeInspiring Creations, It's a Very Cherry WorldJust A Girl, Keeping It Simple, Krafty KatLolly JaneLovely Crafty Home, Making the World CuterMarvelously Messy, My Backyard Eden, My Uncommon Slice of SuburbiaPaisley Passions, Passionately Artistic, Rook No. 17Running With Glitter, Savvy Southern StyleSew Can DoSimply Designing, Singing Three Little Birds, Skip to My LouSomeday Crafts, Somewhat SimpleSunburnt Cow, Tatertots and Jello, The DIY Home Sweet Home ProjectThe Girl CreativeThe Shabby Chic CottageTrendy Treehouse, Truly Lovely, Under the Table and Dreaming and What Allie's Making Now

Sunday, April 10, 2011

Belated Birthday Card

It was my dear sister's birthday a few weeks ago. I wanted to make her a nice card but I wasn't inspired to create anything special. I create things all of the time and yet I had a creative block when it came time to make her a card. I could have bought her a card and sent it in time for her birthday but I waited because I wanted to make something special.

Then I received a lovely, vintage table cloth and it ignited a spark of creativity.
I scanned a section of the table cloth and added the words in Photoshop. I added three vintage buttons to finish off the card. This is exactly the inspiration I was waiting for.

Here is the inspirational table cloth.

Happy birthday Elaine! Sorry this is belated.

This is linked to:
A Little Knick KnackAll Thingz Related, Baked by JoannaBetween Naps on the Porch, Beyond the Picket FenceBlue Cricket Designs, Brambleberry Cottage, Chic on a Shoestring DecoratingCoastal Charm, Craft EnvyCreative Everyday, Decor to AdoreFave CraftsFinding FabulousHey, What's For Dinner Mom?, House of Grace, I {heart} Naptime, Inspiring CreationsIt's A Very Cherry World, Just a GirlKeeping it Simple, Krafty Kat, Lovely Crafty HomeMaking the World CuterMarvelously Messy, My Backyard Eden, My Romantic HomeMy Uncommon Slice of Suburbia, Paisley PassionsPassionately ArtisticRook No. 17Running With Glitter, Savvy Southern Style, Simply DesigningSkip to My Lou, Someday Crafts, Somewhat Simple, Tatertots & JelloThe DIY Home Sweet Home ProjectThe Girl Creative, The Shabby Chic Cottage, The Shabby NestThe Thrifty HomeThe Trendy Treehouse, Truly LovelyUnder the Table and Dreaming, What Allie's Making Now and Wildflowers & Whimsy

Tuesday, October 26, 2010

Thank You card


Today I Created | A Thank You card

I created this thank you card using the Sizzix Ticket Strip die and the Tattered Floral die. I used the Tim Holtz acrylic stamps for the ticket image and left the center of one ticket empty so that I could add the word "Thanks".

I am also announcing a slight change to the format of my blog. Because I have been attempting to create something everyday, I tended to work towards quantity rather than quality. My day, like most people's, is very busy so I don't always spend as much quality time creating as I would like.

So beginning today I am going to attempt for more quality projects but with a little less frequency. I will still create something everyday but I will now allow myself more time to design and create even if it means that I don't post everyday. My goal is to enjoy creating something everyday.

Friday, October 22, 2010

Halloween Card

Today I Created | A Halloween card.

I found this adorable image of a cat inside of a pumpkin in one of my old books. I used this to create a Halloween card.

First I printed the words on a piece of cream cardstock, cut it to 4.5" x 6" and ran it through the Cobwebs, Texture Fades. I inked it lightly with a bit of Distress ink. Next I printed the pumpkin image on a separate piece of paper so that it would not have the cobweb texture on the image.

I adhered black ribbon to the cream cardstock and adhered the Pumpkin image. I inked the edges of a blank card then attached the cream cardstock on that.

Finally I tied two buttons together and glued that on top.

Wednesday, October 13, 2010

Baby Card

Today I Created | A card for baby Nathaniel Liam

A friend had a baby this past weekend. I wanted to make a card to celebrate the happy occasion.

I started with an image from the GraphicsFairy. I changed the color to a soft blue and added a cream-colored background before I printed it.

I admit that I am a Basic Grey hoarder. I love their designs and have quite a large stash. This was a great way to use up a bit of the Wisteria pattern paper.

I cut two background pieces of coordinating paper, attached a bow and mounted this to the white card. I die cut the scalloped circle using the Sizzix Clear Die Circle, Scallop so that I could center the paper pattern. I die cut the phrase "Baby Boy" from a Sizzlits die and added that below the ribbon.

Finally I cut the illustration with a circle cutter, centered it within the scalloped circle and adhered it to the top of the card.

Welcome baby Nathaniel!

Tuesday, October 12, 2010

Old Japanese Illustrations

Today I Created | A card using an old Japanese illustration.

I have been inspired by Karen, the GraphicsFairy and her wonderful selection of vintage images. I started looking through some of my old books for images. I found a Japanese book with some wonderful illustrations but unfortunately I cannot read Japanese.

I found this sweet image of a young woman with a quilt and an origami crane. On top of the quilt appears some papers (a scrapbook perhaps?) and on top of the papers is a pair of Japanese scissors. She reminded me of all of the crafts I enjoy.

I scanned the image, changed the colors in Photoshop and added the type. A very simple project today.

Wednesday, October 6, 2010

Haunted Halloween Card


Today I Created | A Haunted Halloween Card

I had been thinking about making this card for quite a while and finally had all of the materials to actually create it.

I wanted to use the clear plastic Sizzix packaging as the material to die cut clear ghosts. I had bought a pair of extended cutting pads and the plastic packaging was perfectly suitable for die cutting. I cut six pieces from the Ghosts #3 die. These cut very nicely and saved some plastic from going into the trash.

I used both Cosmo Cricket and Basic Grey papers to decorate the front of the card. I used the Phrase, Boo die for the front.

Next I cut seven black pieces of the Sizzix Pumpkin 3-D pop-up die by Karen Burniston. I assembled these as instructed and placed them in the middle of a folded 6" x 7.5" black card. I glued the ghosts to the folds of the "pumpkin" so that they float when the card is opened.

This was such a fun card to make and I like that the packaging plastic cut so nicely.

Happy Haunting!

Tuesday, October 5, 2010

Hocus Pocus Card

Today I Created | A Halloween Hocus Pocus pop-up card.

My sister had given me a bag full of googly eyes and I didn't have a clue as to what I wanted to do with these. Well, it will be Halloween soon so I decided to make something "scary" using these eyes.

First I die cut the tree using the Tree, Scary die and glued googly eyes to the branches. Next I die cut a Sizzix Spinning 3D Platform by Karen Burniston and mounted it to the center of a 6"x6" card. I glued a piece of Halloween paper to the spinning platform and then glued the tree to that.

The front of the card has a shape by DaisyD and the spider is from the Spider & Spiderweb pop-up die.

The card lays flat when closed with eyeballs and arms sticking out of the side. As you open the card the tree spins and is presented facing the viewer. As it spins, the eyes also move about in a friendly, scary way.

Monday, October 4, 2010

Paper Doll Card

Today I Created | A paper doll thank you card.

I discovered a wonderful site: http://graphicsfairy.blogspot.com/
The shared graphics just make you want to create all kinds of wonderful things.

I wanted to create a Thank You card for my friend that took me out on a garage sale hunt. She loves vintage things so I thought that a vintage paper doll would be the perfect graphic to use for a card. This lovely blonde paper doll even looks like my friend.

I first created the card layout in Adobe Illustrator using the doll and the dog images. I added "ribbon" that I scanned and changed the color to match the light teal color. Next I created a plaid background for color. On the same cardstock I had also placed the dress to be cut out later.

I printed the card then carefully cut around the top half of the paper doll. I folded the card in half being careful not to bend the doll so that she stands straight up. I then cut out the dress and placed it on the doll.

I printed the inside of the card separately on plain paper, trimmed and folded to fit then glued inside to hide the cut-out of the back of the card.

Thank you Karen the Graphics Fairy!

Sunday, October 3, 2010

Completed Global Card


Today I Created | A card to contain the 3-D pop-up globe

Two days ago, I made a "globe" out of old atlas pages and the Sizzix 3-D pumpkin pop-up die by Karen Burniston. I decided to make a more graphic card using this so I removed the globe from the white cardstock it was originally mounted on.

First I cut a piece of chipboard with the same 1/2" gusset. I attached  Cosmo Cricket's, The Boyfriend, Study Hall paper to the outside of the chipboard card. Next I attached the Homework paper to the inside of the card.

The text box on the front is by Little Yellow Bicycle, Journal Tablet and the lettering is Sizzlits Playground font dies.

Inside, I printed the words on a piece of the Homework paper. Then I reattached the globe to the inside of the card.

Friday, October 1, 2010

Global card

Today I Created | A Global card

I wanted to use maps from my old atlas to create a pop-up globe.

I adhered pages from the atlas to white cardstock. This gave the map pages more stability. Then I cut them with the 3-D Pop-up Pumpkin die by Karen Burniston.

After assembling the globe I attached it to a white card. I printed the saying on a piece of white cardstock then trimmed it to fold into a 4"x6" card with a 1/2" gusset.

I plan to do something more creative with this experimental "globe".

Friday, August 20, 2010

Birthday Card


Today I created | A 22nd Birthday card.

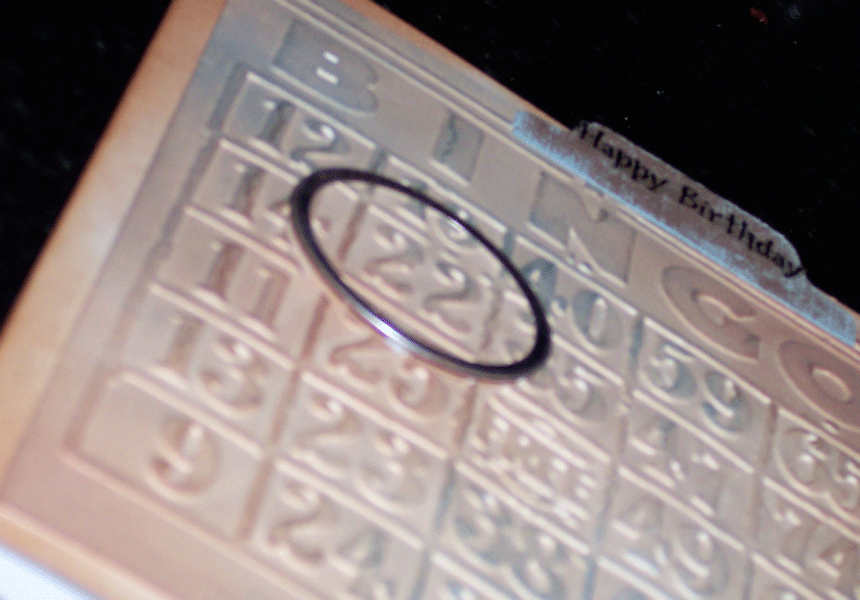
I'm still playing with the Tim Holtz Texture Fades but this time it was his Bingo card design. I chose one number and cut it out of the background. I put it into the Tag Maker and then attached it with double-stick foam tape so it floated over the background.

I might play with it some more and distress it further. This was a very simple card but I liked playing with the visual dimension part.

Monday, August 9, 2010

Collage


Today I created | A collage.

I used to love doing collages. They were fun and spontaneous and usually had unexpected results.

I had found these dress-up stickers by Little Yellow Bicycle and immediately thought of this one particular photo of my sister and I. Our mom used to sew all of our clothes and sometimes would make us dress up and pose for photos. Mom was a really good seamstress but my sister and I were not necessarily the best fashion models.

I made this card for my sister because only she would enjoy this memory as much as me.

Saturday, August 7, 2010

Postcard Card


Today I created | An embossed Postcard using a Tim Holtz Texture Fade by Sizzix and Core'dinations paper.

I have had this unused paper in my stash for a while so it seemed like a good time to pull it out and use it. The Texture Fade hasn't been released to the market yet but I made this paper to play with.

After embossing, I sanded the paper but it wasn't enough. I inked the edges and still wasn't happy. I finally used some Crackle paint and reinked parts to make it look interesting enough.

The tape is from cutetape.com. The butterfly is a paper punch. The charm is from my Tim Holtz stash.
Related Posts Plugin for WordPress, Blogger...