Showing posts with label Texture Fades. Show all posts

Monday, December 3, 2012

Designers Craft Connection Blog Hop - December

Welcome to the Designers Craft Connection Blog Hop for the month of December. This month's theme is "Handmade for the Holidays".

I am excited about this month's theme because; 1) I love making things, 2) I love the holidays and 3) I had a perfect idea for a dual-purpose project.

My sister and I exchange handmade ornaments every year. This year our theme was "Something Made of Paper". So combining the themes I created a "Tim Holtz Cuckoo Clock" ornament.
I began by covering a small box with old sheet music. This happened to be from The Nutcracker Suite in case anyone happens to notice. Before I sealed up the box I punched two small holes in the bottom of the box and ran a small chain through it leaving both ends hanging out of the bottom. I sealed up the box and used Distress inks to age the paper edges.
Using all Sizzix dies, I die cut two Tattered Pinecone pieces and followed Tim Holtz's video to create the pinecones hanging beneath the clock. I added some snowy glitter using white glue.
I cut out a House, 3-D and used the Woodgrain Texture Fade for added dimension to the sides. Again, using Distress inks I highlighted the raised texture. I cut an opening near the top arch and attached a small die cut Cardinal {more festive than a Cuckoo Bird}. 
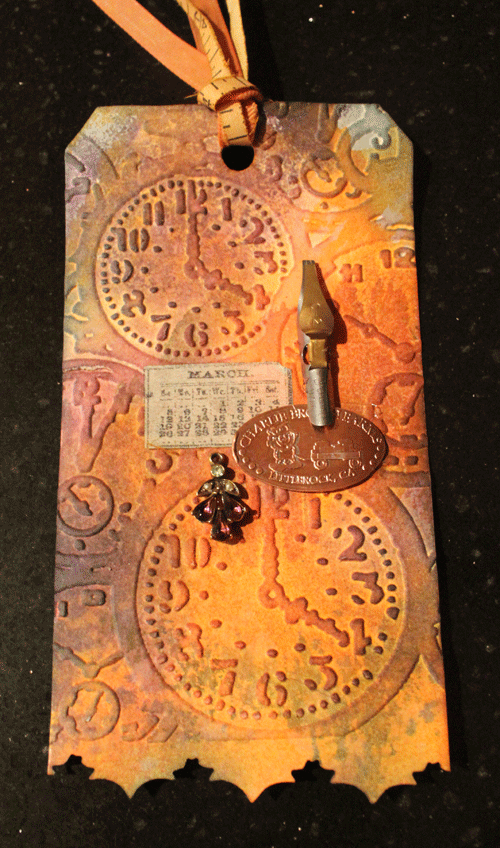
I die cut the Weathered Clock and first applied Tea Dye Distress ink as a background color. Next, I used Perfect Medium with an all-over pattern stamp and applied Perfect Pearls in Heirloom Gold. This created a random, worn metallic look to the clock face. Before assembling the clock/house I laid the clock face on the front and determined where the clock hands would be attached. I used a small brad to attach the hands then removed the clock face while I worked on the next steps. 
I assembled the clock/house and decided that it needed a roof. I folded a piece of brown cardstock and ran both sides through my Vagabond die cutting machine using the Snowflurries Texture Fade. I sanded the raised surface to give it more texture. I also added a small piece of die cut Vintage Lace along the front edge of the roof. It is cut from more old sheet music and left over from a previous project. It gave the house a gingerbread roof line. I used a large needle to punch two holes in the roof and top of the house. I glued the roof to the house then strung a piece of vintage ribbon through the holes.
I used hot glue to attach the house to the bottom box. I glued the clock face to both the house and the base. On the left side of the clock I added a small bottlebrush tree. On the right, I glued a small die cut Reindeer.

I hope you enjoyed my Handmade for the Holidays project. Please use the DCC Blog Hop button on the right to visit all of the talented designers and see their creative projects.

This is linked to:
Beyond the Picket FenceCoastal CharmElizabeth and Co., Making the World CuterMy Uncommon Slice of Suburbia, Savvy Southern StyleSew Can Do, Sew Much AdoSomeday CraftsSugar Bee Crafts, The Shabby Creek CottageThe Thrifty HomeThe Trendy TreehouseTopsy Turvy and Twin Dragonfly Designs

Sunday, March 25, 2012

Personalized Gift Tags

I gathered together two boxes of gifts and goodies, one for my friend and one for my sister's birthday. I wanted to make a personalized tag for each of them. I began by using some simple decorative techniques using Distress Inks and finished by embellishing with vintage/thrifted treasures.

Here are the two finished tags.

I began with two die cut Tags and applied Distress Inks in a random pattern.

The one on the left was embossed using the Leaves Textured Impressions by Sizzix. I then used an ink applicator and applied more Distress Ink to highlight the raised edges. Along the bottom I "gathered" Tissue Tape and a piece of thrifted lace, both were colored with Distress Stains. I attached a thrifted rhinestone earring, a shell button and an old metal button that says Hawaii. My friend is from Hawaii so it was the perfect embellishment.

The second tag is for my sister as part of her birthday present. Because birthdays are a way of measuring time I decided to use the Pocket Watch Texture Fade to enhance her tag. I used the Ornate On The Edge die to add a decorative edge along the bottom of the tag.

I embellished the tag using several objects that remind me of my sister. First, her birthday is in March so I used a piece of the Tissue Tape that has a March calendar. Next, she collects Squished Pennies so I added one from an out-of-the-way store called Charley Brown Farms in Littlerock, CA. I'm guessing that she doesn't have a squished penny from there. She is also a good calligrapher so I attached an old pen nib that I thrifted. And to balance the design and add a little bling, I added a piece of a vintage earring.
As a finishing touch and to keep with the "measuring" theme, I used a piece of an old fabric measuring tape as a ribbon. 
I'm going to go add these to their gift boxes and get them ready to post. I hope they enjoy their tags as much as I enjoyed creating them.

Thursday, November 11, 2010

Sizzix Triple Play Blog Hop - Twist Cube, 3-D


Today I Created | Karen Burniston's 3-D Twist Cube using mostly Tim Holtz product.

Welcome to Week 2 of the Sizzix Triple Play Blog Hop. The featured die is the Sizzix Cube, Twist 3-D pop-up Bigz XL die by Karen Burniston. I had a lot of fun with this project so I included a lot of details regarding products used and various techniques.

My design concept was to try and use as many Tim Holtz products from my stash as possible. I started off by doing a lot of sketches and some test cuts to see how everything went together. When I was ready I cut all of my pieces from tan cardstock (the only product I had to purchase) and made little piles of embellishments that I planned to use on each side. Next came the fun part of decorating the sides.

The image above is the top with the cube folded flat. I used the Sizzix Retro Circles Texture Fades to create the pattern in the paper and Distress inks in Spiced Marmalade, Tea Dyed and Barn Door. I applied the inks using the technique in Tim's Compendium of Curiosities (CC) book, page 33. I attached the Button (my stash) by inserting the stem of the button through the cardstock and attaching it with wire hidden inside and then looping a Ball Chain around the button. Other products used: Journaling Ticket and ABC Skid alphabet stickers by Creative Imaginations. The other items you see along the edges are actually parts of the various sides of the cube and will be described later.

On the front of the cube I used the Cracked Texture Fades and applied the same colors of Distress inks plus Dusty Concord using the CC technique on page 40. The die cut shape is the Styled Label stamped with the Crown from the Regal Flourish stamp set using the technique on CC page 37. I also added a Game Spinner.

The left side has two paper images from the Graphics Fairy. The crown paper just worked so perfectly in this design. The stamp in the corner is part of the Regal Flourish set using Black Soot Distress Ink. I also used some Traveler Tissue Tape, Ball Chain and Type Charm. I punched a small hole on the front and side of the cube and hung the Type Charm from the corner.

The back was a little more free-formed. I used the same inking technique on CC page 33 but without the Texture Fade so the ink blended on the paper surface. The Clock is from the Journey stamp set. The Wings (top right corner) are die cut from plastic packaging using the Sizzix Heart Wings die and then embossed with the Patchwork Texture Fade. I inked them with Alcohol inks in Purple Twilight and Sunset Orange.

On the right side I inked all of the edges before assembling so I was able to get crisp edges. The wing is created with the Regal Flourish stamp and Perfect Pearls using the CC technique on page 38. The Crown is die cut from Grunge Paper using the Sizzix Heart Wings die then I applied Rock Candy Distress Crackle Paint and Dusty Concord ink using the technique on CC page 42. It is attached using a Memo Pin. Other product used: Filmstrip Ribbon with a bit of Alcohol ink for color.

The bottom side worked well because I used only three main colors of Distress inks in this project so, although the panels are all very different, they visually work together. I used a French postcard image and a French map image from the Graphics Fairy on two panels. The other panel is a continuation of the side. I added more Traveler Tissue Tape and a stamp from the Journey set.

I didn't want to ruin the surprise of the completed cube so I left these last two photos for the end. As I said at the beginning, I did sketches and made samples to see how everything would work together. Before assembing the final cube I laid everything out to see how it would work. Here are the photos prior to assembly. You can see in these photos that I had additional embellishments (Swirls and Key) that I did not use in the final piece.

I hope you enjoy this example of the Twist Cube as much as I enjoyed making it. And thanks to Karen Burniston for designing such a clever die.

Please continue on through the Blog Hop using the Forward or Back links in the Triple Play Blog Hop blinkie. And please be sure to visit again next Thursday when the featured die will be the Flower, Beauty Bloom.

Friday, October 22, 2010

Halloween Card

Today I Created | A Halloween card.

I found this adorable image of a cat inside of a pumpkin in one of my old books. I used this to create a Halloween card.

First I printed the words on a piece of cream cardstock, cut it to 4.5" x 6" and ran it through the Cobwebs, Texture Fades. I inked it lightly with a bit of Distress ink. Next I printed the pumpkin image on a separate piece of paper so that it would not have the cobweb texture on the image.

I adhered black ribbon to the cream cardstock and adhered the Pumpkin image. I inked the edges of a blank card then attached the cream cardstock on that.

Finally I tied two buttons together and glued that on top.

Thursday, October 14, 2010

Bottle of Poison

Today I Created | A poison bottle label.

I started off with the image of a skull from the Graphics Fairy. I printed this on a sheet of cardstock leaving lots of space on the left side of the sheet.

I then ran this through the Poison, Texture Fades. Since the cardstock was white I used the Antique Linen Distress Ink to age the entire paper. I used a paper edge distresser to roughen the edges of the cardstock. I applied Tea Stain Distress ink to give it more age. Since I felt that it was still too bright, I sprayed some Suede, Glimmer Mist on the corners.

After this was completed, I realized that this label needed to be attached to something. I had an old-looking, hand-blown bottle that looked just old enough and odd enough to perhaps hold poison.

A perfect Halloween decoration. Enjoy!

Thursday, October 7, 2010

Spooky Halloween Banner

Today I Created | A Spooky Halloween Banner

I am in the Halloween spirit and wanted to create a Halloween decoration. I found some wonderful skeleton images from the GraphicsFairy.

First I printed the skeletons on cardstock. I trimmed them to size along with pieces of plain orange cardstock. For the skeleton banners, I sprayed them with Periwinkle Glimmer Mist and while they were still wet, I sprinkled copper Perfect Pearls to make them appears rusted.

Next I ran the orange banners through the Cobwebs Texture Fades. I edged everything with black Distress Inks. I then sewed all of the banners onto a piece of ribbon.

I created the black and orange Paper Rosettes and attached them to the front of the orange banners. Finally, I attached the bit of bling to the bottom of the skeleton banners just to add a bit of sparkle.

Saturday, September 25, 2010

Halloween spirit

Today I Created | A decorated frame in the Halloween spirit.

This project began with an oak frame. I rubbed the oak with steel wool and painted it black using acrylic paint.

I used an orange piece of paper embossed with the Texture Fades, Pumpkin Patch pattern. I sprayed it with brown, red and olive green Glimmer Mist and sprinkled salt on it while it was drying. The salt created the "stars" in the top corner near the moon. After the paper dried I rubbed black ink to make the pumpkins stand out.

I used a Tim Holtz Scaredy Cat die cut that I first applied Picket Fence Crackle Paint and then rubbed black ink to create a rough texture.

The fence is the On the Fence, On the Edge die that I inked and sprayed.

The moon is cut from Glow in the Dark paper using a circle punch.

To assemble the piece, I glued the fence and cat to the front of the picture glass. I glued the moon to the background paper and applied foam spacers along the edge of the paper to add some dimension behind the glass.

The last thing I did was to add the blood splatter. I used my glue gun with the intention of making it look like a spider's web in the corner but the glue fell as droplets. This gave me the idea to color them red with alcohol inks and turn them into blood droplets instead. A happy accident.

Wednesday, September 22, 2010

Findings Tag

Today I Created | A findings tag.

Because this tag is so clean and simple, I plan to use it on a scrapbooking page. I left enough space to journal on the tag.

I embossed just one corner with a Texture Fade. I used a rubber stamp to add the bit of type on the side. I used Distress Inks to add some color along the edges.

Finally, I added a Trinket Pin to hold a tiny pair of scissors. The metal scissors were from a pair of earrings that broke but I loved the scissors so much that I kept it. I have so many odd findings that it is nice to use them in these little projects.

Thursday, September 16, 2010

Skeleton Tag

Today I Created | A Skeleton tag

I used the wax-resist technique on this tag. I started with a cream-colored tag and embossed the skeleton using the Halloween Night Texture Fade. I rubbed wax over the skeleton, fence and spider web allowing the unwanted raised parts to "disappear" later.

I sprayed Raven Glimmer Mist and dusted some white Perfect Pearls while the tag was still wet. The raised parts of the tag that weren't rubbed with wax then disappeared when covered with the dark Glimmer Mist.

I used three rain drop stickers by Cloud 9 Design and applied red Alcohol Ink to create blood drops. The bats were cut from a Sizzix die and glued onto craft wire. The ticket is by Daisy D.

Tuesday, September 14, 2010

Distressed Snowman Tag

Today I Created | A wax-resist snowman tag.

The idea for this project came from the lessons I learned while creating yesterday's Halloween tag.

I started with a pale blue tag cut from the eclips Christmas cartridge. I used the Tim Holtz Snow Flurries Texture Fades to create the snowflake pattern. I rubbed the raised surfaces with wax. Then I sprayed a light coating of Sea Glass Glimmer Mist and wiped off any excess. This created the overall snowflake pattern. I let this dry thoroughly so that the paper was stiff.

Next, I ran it through the Snowman Texture Fades to emboss the snowman on top of the snowflake pattern. The cool part of this technique is that the flat part of the Snowman Texture Fade flattened the background snowflakes so only the snowman is a raised pattern.

Finally I used Denim Distress Inks to highlight the edges of the Snowman.

Monday, September 13, 2010

Halloween Tag

Today I Created | A Halloween tag using a wax-resist technique.

I had an off-white tag with a Sizzix Texture Fade Cracked pattern embossed on it. I began to wonder what would happen if I rubbed the raised parts with wax and then sprayed Glimmer Mist on top.

Luckily I had a block of wax left over from my old candle-making days so I rubbed and sprayed and was quite happy with the results.

I added a pumpkin die cut sticker from Cosmo Cricket and used some buttons for eyes. The words and crow are cut from the eclips Halloween cartridge. And the tag is cut from the eclips Christmas cartridge.

This gave me an idea to experiment further with this technique.

Saturday, September 4, 2010

Textured Rollodex card

Today I Created | A Rollodex card using Texture Fades.

I used a standard Rollodex card and ran it through my BigShot machine using a Tim Holtz Texture Fade. The paper is a little thin for this application but it worked. I would suggest cutting a card from thicker paper and running it through a Texture Fade.

I am trying to make the designs fit the person named on the Rollodex card. This will be used for a friend that works in the automotive industry.

Wednesday, August 25, 2010

Squirrel Tag

Today I Created | A Squirrel Tag

There is a story behind this squirrel tag. It involves a wedding reception, a squirrel and pinecones but the relevant part is that my friend wanted to use a squirrel diecut as a humorous gift for her mother-in-law.

I offered to decorate the tag before the squirrel was applied as decoration.

I cut the tag, squirrel and oak leaves using the eclips. I used the tree bark Texture Fade to create the surface texture. Then I sprayed several layers of Glimmer Mist and rubbed some ink to add a bit more color.

Friday, August 20, 2010

Birthday Card


Today I created | A 22nd Birthday card.

I'm still playing with the Tim Holtz Texture Fades but this time it was his Bingo card design. I chose one number and cut it out of the background. I put it into the Tag Maker and then attached it with double-stick foam tape so it floated over the background.

I might play with it some more and distress it further. This was a very simple card but I liked playing with the visual dimension part.

Saturday, August 14, 2010

Christmas Tag

Today I created | A Christmas tag

I'm really beginning to enjoy making tags. I think of them as little bits of art.

This reindeer Christmas tag was first inked with red and black along the edges. Then I embossed it and applied green paint with a brayer.

Previously I had embossed the tag and then added the inked edges but I experimented with adding the ink before embossing. This technique allowed the "valleys" between the raised parts to show more color from the ink.

The reindeer and tag were cut using the eclips. The embossed texture is from a Tim Holtz Texture Fade.

Tuesday, August 10, 2010

Halloween Tag


Today I created | An embossed Halloween tag.

I'm not a big "tag maker". I've never made a tag before.

This tag was cut using the eclips shape cutter. I embossed the spider web using one of the new Tim Holtz Texture Fades. Next I inked and painted and added Perfect Pearls and inked some more until it looked pretty distressed. I stamped the words "Happy Halloween" on adhesive-backed, cotton tape from cutetape.com. The hole reinforcer is also from cutetape.com.

The key might be a real skeleton key that I had in my stash. I curled some wire and used it to attach the key. I tied it off with some green velvet ribbon.

Lots of work for one tag. But since the purpose of this Blog is to stretch my creative wings and try new things then this all made sense. Tags are perfect little "canvases" for art to be created and then given away.

Saturday, August 7, 2010

Postcard Card


Today I created | An embossed Postcard using a Tim Holtz Texture Fade by Sizzix and Core'dinations paper.

I have had this unused paper in my stash for a while so it seemed like a good time to pull it out and use it. The Texture Fade hasn't been released to the market yet but I made this paper to play with.

After embossing, I sanded the paper but it wasn't enough. I inked the edges and still wasn't happy. I finally used some Crackle paint and reinked parts to make it look interesting enough.

The tape is from cutetape.com. The butterfly is a paper punch. The charm is from my Tim Holtz stash.
Related Posts Plugin for WordPress, Blogger...